


Though gels are often used to correct colors or to create a bold dance club look, I think they’re a blast to use for creative fun. I often use them to change the color of an outdoor background while leaving the model’s skin color the same. That means I can add more blue to a sky or warm up the sky for a sunrise look while keeping the model looking normal.
As I demonstrate in this video, I can add a colored gel to my main portrait flash, create a manual and custom white balance based on that light, which will cause the background to go the opposite color. One trick though is to make sure your flash overpowers your ambient light for deeper and more vivid tones while keeping your model’s skin color accurate.
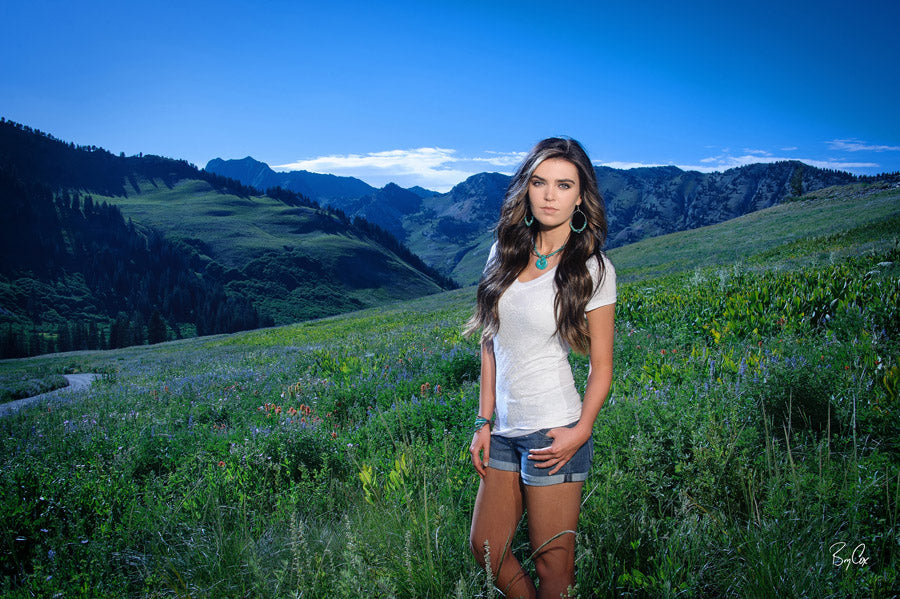
For this shoot, I chose a spot that would be hard in natural light. We’re on top of a Utah mountain with no shade, at close to noon. Shooting natural light would mean a washed out sky and dark eye sockets on the model. So with the sun straight up, this is a perfect spot for flash. But I also want the sky to be a deeper blue, so I used a warm gel out of my Rogue Flash Gel Kit.
The camera, flash output, white balance – everything is set manually of course. The model’s skin tones remain normal and the background goes cool, the opposite color of the gel. That makes my sky more blue than normal, and the greens are a deep and beautiful blue/green.

I explain it all in the video above, but to sum it up I’m combining everything we talked about in the previous three articles. I’m doing custom white balances throughout the shoot, I’m controlling light angles based on the model’s face, but now I’m adding Rogue Flash gels to my lights for more creative fun. And in doing so, I can change the color of my background.
And if I don’t want a blue background but rather a warm sunrise look, I can do that too by adding blue gels to my flashes.

There are a lot of purple flowers in this meadow that didn’t show up in these previous images. A green gel creates a more magenta background that accentuates those purple flowers in the meadow. I’m in the same spot with the same high sun, but now getting a completely different look outside, just using these Rogue Flash Gels and a new custom white balance.

I thought it’d be fun to end with a warm sunset look, so back to the cool gel on the flashes for these next set of images.


Finally, I wanted a misty morning look, so I ran my fog machine behind the model using a portable battery unit, and lit the fog with another flash. It gave me a nice ambiance that’s not possible with basic lighting techniques on a typical hot, summer day in the dry, non-misty mountains of Utah.
When we take full control our lighting and really understand what we’re doing, we can create any look we can imagine.

True creativity is the ability to solve problems. And many shoots are not ideal, but rather full of problems. Not every day can be warm or sunny, and not all shoots can be at the “perfect” time of day. But no matter what, it’s still up to us to create perfect images. Understanding lighting and color and doing things manually, can be a great tool for problem solving and creating wonderful images on a not-so-perfect day.
With the technical aspects all set manually, I can focus completely on the model, her personality with full engagement. I want genuine expressions and smiles that draw the viewer in.
I’m excited to see what you all create with these tools and techniques. Have fun and happy shooting.
And until next time, America.
Additional Blog Posts in this Series:
Part 1: Get Perfect Color in Camera with the ExpoDisc
Part 2: Improve Your Natural Light Portraits
Part 3: Using Speedlights & Modifiers to Improve Your Portraits