


Light is a tool that photographers can use to create a completely different environment, style, character, or in this situation all three! Watch as photographer Tom Bol uses a few flashes and Rogue modifiers to show how easy it is to capture a unique character.
The vision for this portrait will be based off The Mad Hatter from Alice in Wonderland. First we have to establish a base exposure for our environment. Shooting in aperture priority, shutter priority, or program will leave us with what our camera believes to be a "balanced exposure" where it attempts to average the entire image into 18% gray.

However we want to capture a darker alley, so by underexposing two stops in manual (shutter, aperture priority, or program) we can reduce the amount of ambient light entering our camera and create an environment that is better suited for our flash units.

Next we'll start with a main light. Because we're working in a narrow alley way with very little working room, we'll need to set a boom that can go over the camera and down onto the subject. But now that we see our image we can see that light from a bare speedlight isn't very flattering. The light appears harsh and is spilling all over our narrow alley.

To fix this problem we'll modify the flash with a Rogue FlashBender 2 XL Pro with the Strip Grid Diffusion Panel attached which is included in the system. The Strip Grid Diffusion Panel will make the light source larger relative to our subject, which makes our light softer, and it will also create a narrow beam and prevent light from spilling all over our scene.

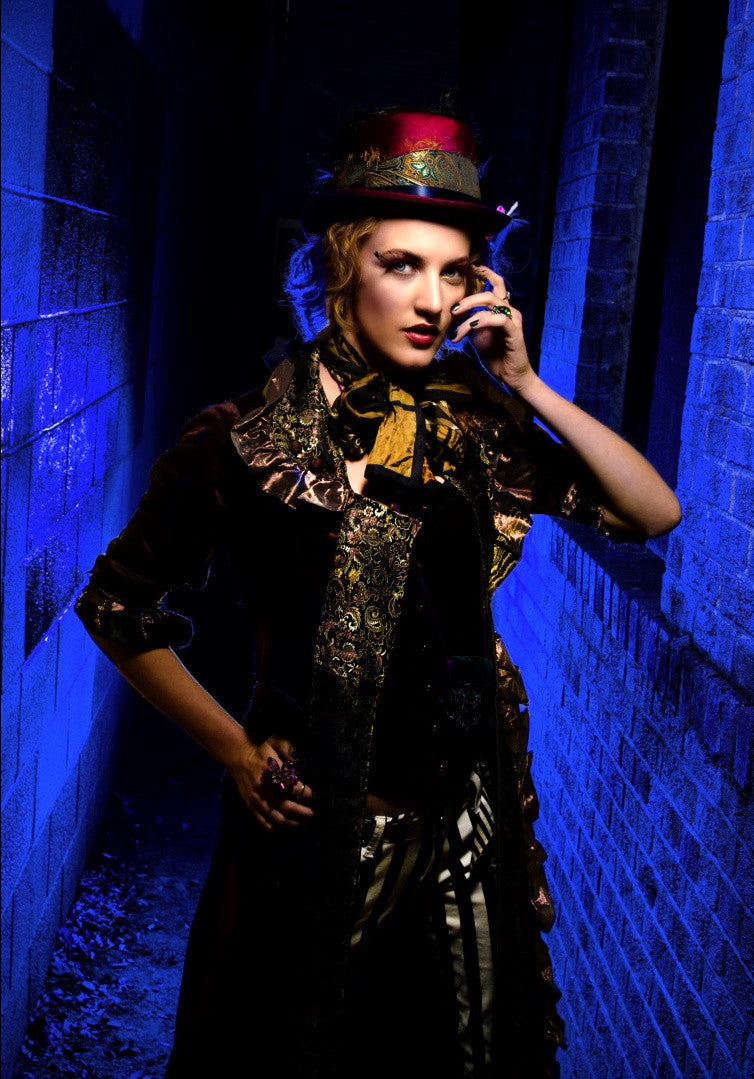
Finally we'll add a speedlight behind our subject to create some mood in our environment and to make our subject pop out from the background. We're going to modify this speeldight with a blue gel from the Rogue Flash Gel Combo Filter Kit. With this the light turns blue and rakes across the sides and the ground of the alley way and gives a cool blue back light on our subject.

With a few portable Rogue modifiers, two speedlights, and some adjustments to our ambient light settings, we've created a creative and stylized portrait!
Final Image:

Nice Shot! I’ve been enjoying the Rouge system for quite some time now and just started teaching a second shooter how I use flash benders, the Honeycomb and Grid Gels to produce dramatic home portraits in situations where larger modifiers (umbrellas, flags etc.) just wont fit. We have a shoot coming up this weekend in an apartment living room, I’m planning on using a three light setup and this has just given me an idea for a low key shot I had planed.
Very nice, and thoroughly informative. I always try to use minimal equipment for location shooting, which is the vast majority of my work. I appreciate the compact yet effective gear from Rogue, and this is an example of a superbly executed image!