


A wedding album isn't complete without detail shots that were so carefully chosen and picked by the new couple on their special day. There are plenty of shots not to miss on the wedding day, but some of the most important are those details from the bride.
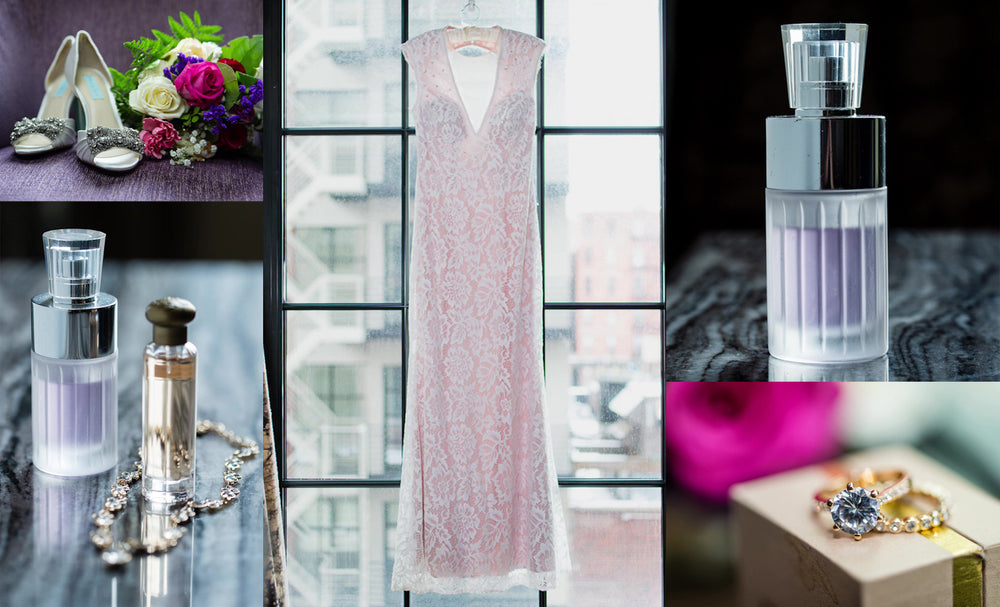
We'll begin by capturing a small, but important detail, from the bride, some jewelry and her perfume bottle. These provide an intimate look at the accessories the bride wears on her wedding day. Because both of these objects tend to be gem, metal, or glassed based we will need to keep in mind that reflections should be minimized in order to keep them free of distractions. Now we can't spray it with magic and make these accessories matte, but we can introduce a giant white surface to make sure the reflection is a pure as possible.

Using the Natural White side of a Rogue 32" Collapsible Reflector we can not only add light into the subject, we can also clean up and add some contrast to the reflection on the perfume's metal accents.


Next we're going to move to the shoes and bouquet. In this situation, the vivid colors of the bouquet pair nicely with the ethereal white shoes. We don't want to create an overly illuminated image by having the window light spill light all over the shoes and bouquet, so we'll style them nicely together on a chair we found in the hotel, face them away from the window, but bring in a reflector to add some semi-directional light to fill in some shadows. Using the Super Soft Silver side of the reflector will maximize our light efficiency but without adding any harsh specularity to the shoes or flowers.


Moving on to one of the most important details to capture: the Bride's dress! Typical photographer protocol is to hang it in a window or from a door to capture, but we're going to take that one step further. If you don't have immediate access to hooks to hang the dress from, it's easy enough to run down to a convenience store and find some cheap non-permanent adhesive or suction hooks to put on a window. By hanging the dress from a window, we have a back-lit scenario which will display all the beautiful fabric design of the dress. However, against a window a photographer will have to battle the detail of the dress against blowing out the highlights of the window.


In order to balance the exposure, we're going to add in a on-camera flash with a FlashBender 2 Large Reflector modifying the light. Our FlashBender 2 Large Reflector will allow us to bounce light up into our ceiling but not create deep shadows from the bounce because the Natural White surface will push light forward to eliminate them.

Finally we'll capture the accessory that brought us to this day: the engagement ring and wedding band. Using the bouquet as our background to add some color , we're going to capture this in front of the window for nice soft light. However, you'll notice that we need just a small pop of light in the main diamond, so with an on-camera flash, we'll attach a FlashBender 2 Bounce Card to add just a small amount of light to make that diamond stand out.


With a few portable accessories, some careful planning, and a small location to stage a few accessories, we've knocked out some great shots to add to our Wedding Album for the Bride to enjoy when she returns from her honeymoon!
Stay tuned for Parts II and III for tips on lighting and styling Groom Details and Cake Images!
Final Results:

Short, informative, usable advices, as always from Erik and with Rogue products. Thanks!
Hi Erik another great video on the Flashbender 2, thanks for this video on catching the detail shots using the natural light and also using the reflector. Look forward to more of your videos thank you