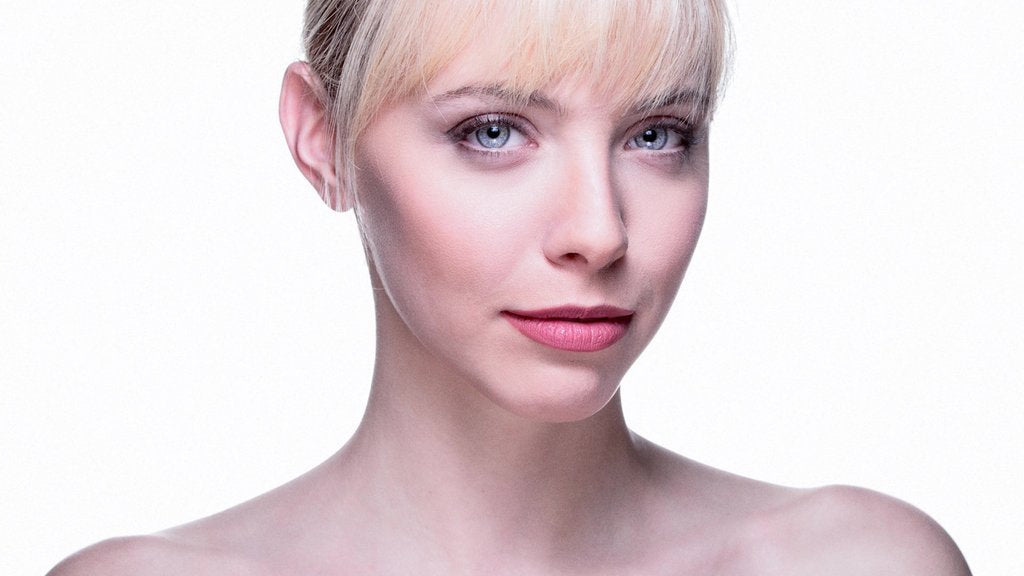
Walk through the mall, open a magazine, see a TV ad for make up and the first thing that's noticed is how bright and clean the image is with large catch-lights and glowing skin. While a some of this has to do with styling the shoot, a lot of it comes from how the image is illuminated. Some photographers would assume that it requires a pricey studio, it's actually quite easy to recreate this look with just speedlights!
The first light to set up is going to be the main light, in this case, a speedlight with a Rogue FlashBender 2 XL Pro Lighting System with the Soft Box Diffusion Panel attached. By hanging it over head (directly over the lens pointed towards the subject) symmetrically with our model's face.

This will provide a nice, large catch-light in the eyes, highlights on the cheeks, chin, and forehead. The main light will also create dimension to the face, because the flash is not coming from directly on camera, which would create a flat lighting effect. The diffusion panel is added to cut down on harsh specular highlights, or sheen on the face.


The second late to add is going to be the background light. The ambient light in the room alone along with any other flash isn't going to make the background a pure, blown-out white, so we have to blast it with light. If we simply point a flash at the back of the wall, we risk spilling light on our subject's shoulders, back of her hair, and ears. To prevent this accidental rim lighting, we'll add a FlashBender 2 Large Reflector to bounce light back on to the background and flag it from spilling on the back of the subject.


The final piece of this portrait is going to be the fill light. The fill light will lighten up shadows naturally created by the main light that builds dimension on our subject's face. There are two ways to fill in shadows from the main: by using a reflector we can quickly and easily reflect extra light from the main and bounce it back into the shadows. Alternatively, we can add a third flash with another Rogue FlashBender 2 Large Reflector, which gives us the ability to finely tune the amount of light that's filling in the subject's shadows, an option not quite as easy with a reflector.


Either way, the fill will give us a second catch-light in the eyes, completing the portrait. Now we have a clean bright background, great highlights throughout our subject's face, and double catch-lights, giving her a full, beautiful eyes that draw viewers into the image.
Final Image:


Love the simplicity, although I am not a fan of the double catchlites. I might use this setup and move the bottom flash a little off-center to get rid of the 2nd catchlight.
Thanks!
I met Erik few years ago at the Google+ Convention in San Francisco. Awesome instructor.